

The sign-up page is branded to the card: it uses the card’s colours, logo, and name, so it looks like your program, not a generic form. Your logo is centred automatically, with the empty space around it cut away.
The customer’s steps
Loyalty cards live in a phone wallet, so sign-up happens on a phone. If a customer opens the link on a computer, the page shows a QR code and the message “Add this card to your phone”, they scan it to continue on their phone.
1
Open the sign-up page
On their phone, the customer scans the QR code or taps the link. The page opens with your card’s branding at the top.
2
Fill in the form
They fill in the fields you set up on the card. This can be as little as a first name and email, or more (last name, phone, date of birth, a choice list, a photo, or your own custom fields), depending on how you built the sign-up form.
3
Agree to the terms
They tick a single checkbox that reads I agree with Terms and GDPR, where each is a link they can open. If your card links your own loyalty programme rules, the same tick reads I agree to the Terms, GDPR and the loyalty programme rules, with your rules as the third link. This tick is required.
4
Add the card to their wallet
They tap Add to Apple Wallet (iPhone) or Add to Google Wallet (Android). A confirmation screen shows “Card successfully added”, and the card is now in their wallet.
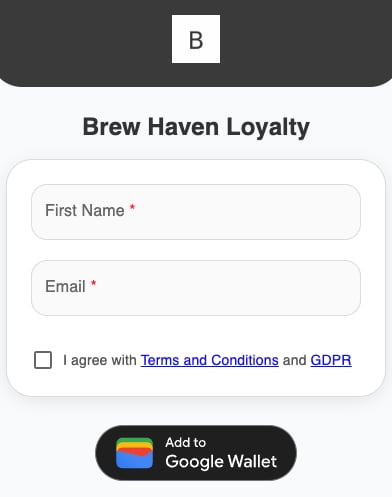
The customer sign-up page
If the customer already has the card
If someone signs up with an email that already has this card (a new phone, a deleted pass, or a card you sent that was not added yet), the page first asks for a 4-digit code. The code goes to that email, or by SMS to the phone number on file if the customer picks SMS. After the code, the card is added with the customer’s points, stamps or balance as they were.The code makes sure only the owner of the email can put an existing card, and its balance, into a wallet. A brand-new customer gets no code.