

- Scans are recorded against a location, so your analytics are split by store.
- Locations power geo-notifications: a customer’s phone can surface their card when they are near your store.
- Each location decides which cards it runs and generates its own sign-up links.
- Each location is a billing unit on PRO, and can be delegated to a manager (see below).
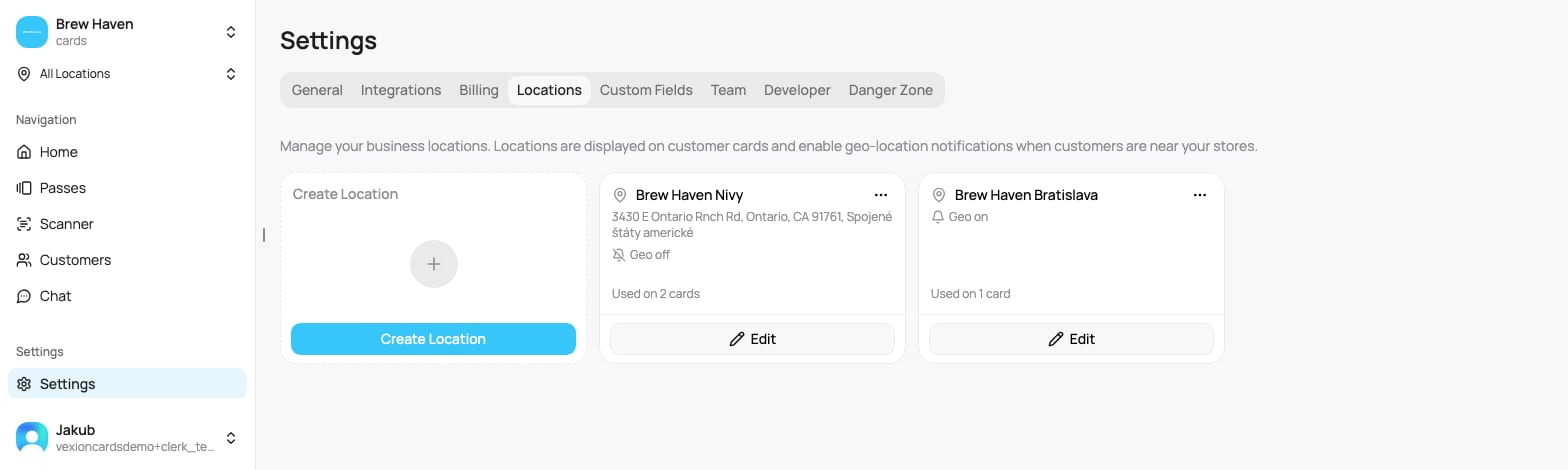
The Locations tab
- the address (up to two lines),
- a badge row, only when there is something to show: the things that need you: Past Due or Returning to you (a delegated location whose manager has not paid, see Delegated billing), Check (a POS branch waiting for your confirmation), Finish setup and Billing is being finished,
- one grey line with the facts: the POS the location is linked to, Delegated, and Geo on or Geo off,
- Used on N card(s).
Delete a location
- On the card of the location, click the … button (More actions) at the top right.
- Click Delete, then confirm.
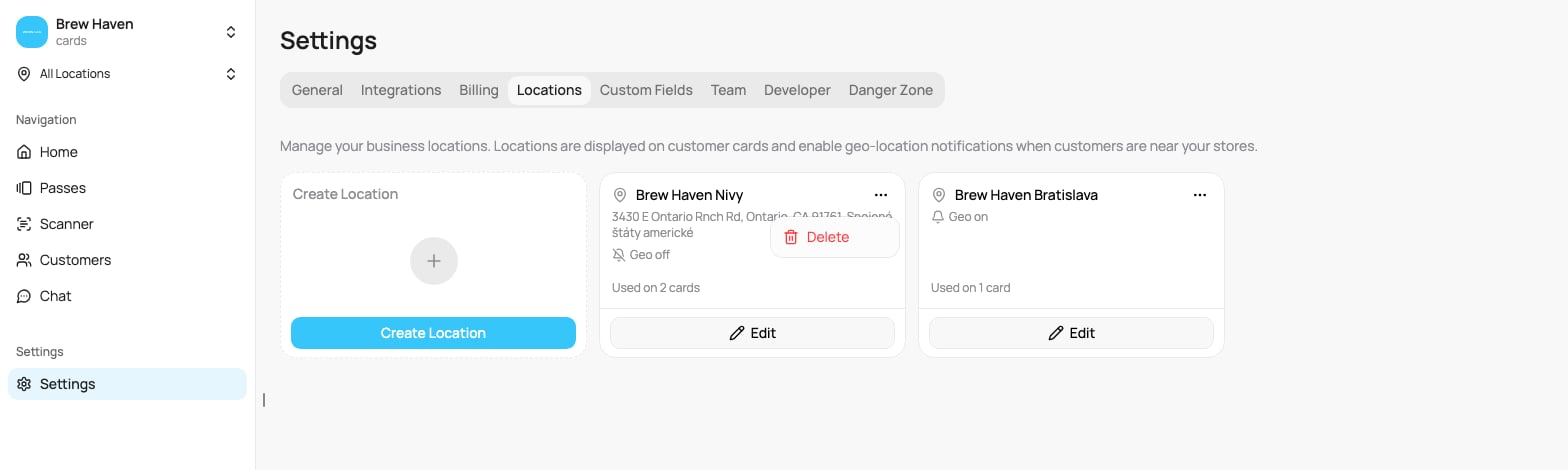
Delete in the card menu
What’s inside a location
Open Edit on a location to manage everything about it:Details and geo-notifications
- Location Name. It cannot be empty. From 80 characters a counter shows how many of the 100 you have used.
- Address (search for it), with a map under it that you can drag to fine-tune the exact position, this is the centre of the geo-notification zone. The address and the pin only change when you pick another address or move the map yourself.
- Google listing: picking your business from that same address search also connects the store’s Google listing. That is what the review link on your cards uses, so a location without one cannot give its customers a review page. To attach it to a store that is missing it, open Edit and re-pick your business from the search.
- Enable geo-notifications toggle with its Push Message right below it: the message a customer sees when they come near this store (up to 500 characters, for example “Store nearby! Stop by for a discount 🎉”).
Cards using this location
A list of all your cards, each with an on/off toggle. A brand new location starts with every card enabled, with the hint: “All your cards will be enabled at this location. You can turn individual cards off later in the location settings.” Turn off the ones you do not want available there, rather than switching things on one by one (some integrations manage this automatically instead, so a location they create for you may start with only the one card it needs). This controls which cards are tied to the location, for attribution, for the sign-up links below, and for what the Scanner can actually do at the till: a card that is off here cannot be earned or redeemed by staff working at this location. Two rules keep these switches sensible:- Every location keeps at least one card. Switching off its last card shows “A location needs at least one card”. If you no longer use the location, delete it.
- Every card keeps at least one location. Switching a card off at its last location shows “The card … must stay on at least one location”, with two ways out: Pause card (new customers can no longer join, current members keep using it) or Archive. A paused or archived card that still has members keeps one location too, so they can use what they collected.
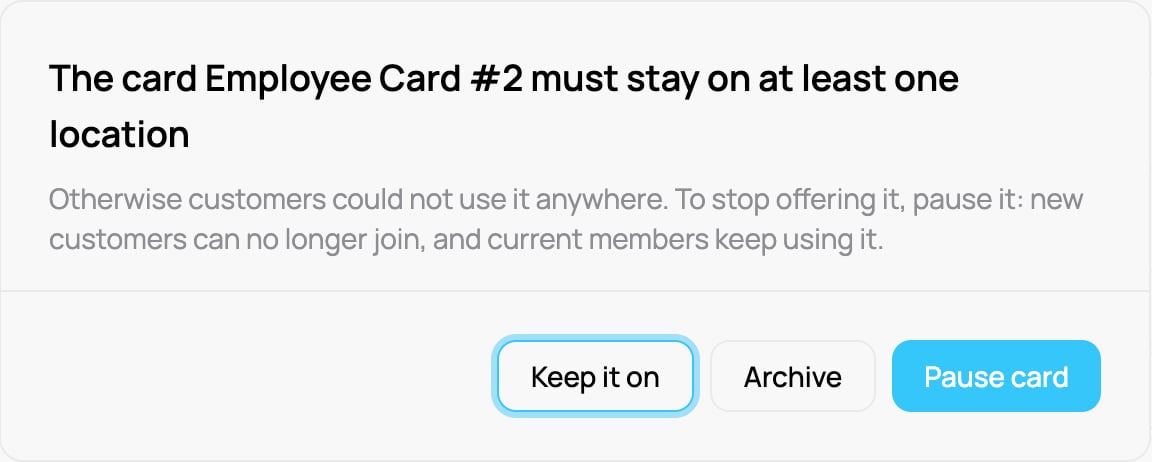
Switching a card off at its last location
Registration Link
For each card you have enabled above, this section gives you a location-specific sign-up link, so customers who join at this store are attributed to it. For each enabled card you get:- Share: opens the Share window with this location already picked. Download the QR code, the poster, the social story or the stickers for this store, see Sharing & Enrolling Customers.
- Copy Link: the link to share online, in an email, or on social media.
The Registration Link section only appears once you enable at least one card for the location (“Enable cards above to generate signup links”). Each link is tied to that card and this location.
POS Mapping
If a POS integration is connected, this links the location to the right POS place so sales sync to the correct store. It shows “No POS system connected” until you set one up. Connecting a POS and mapping its branches works on a computer only, and only for admins. A new POS branch that becomes a location is paid by you, the owner. Delegate it to a manager afterwards if they should pay (see Delegated billing). A branch or till that is not mapped yet keeps giving points, with the same rules as your other locations. If it is still unmapped after 28 days, VEXiON adds it as a new location. Changed till or branch in the POS? Sometimes a branch in your POS is replaced by a new one (for example a new till or a new branch id). VEXiON then shows the new branch in the mapping window with a Check badge and by default offers Link to existing location, with the location it replaces already picked. Keep that choice to keep the sales history of the location. Choose New location (a different shop) only when it really is a different store. A linked location shows the Check badge until you click Confirm on it.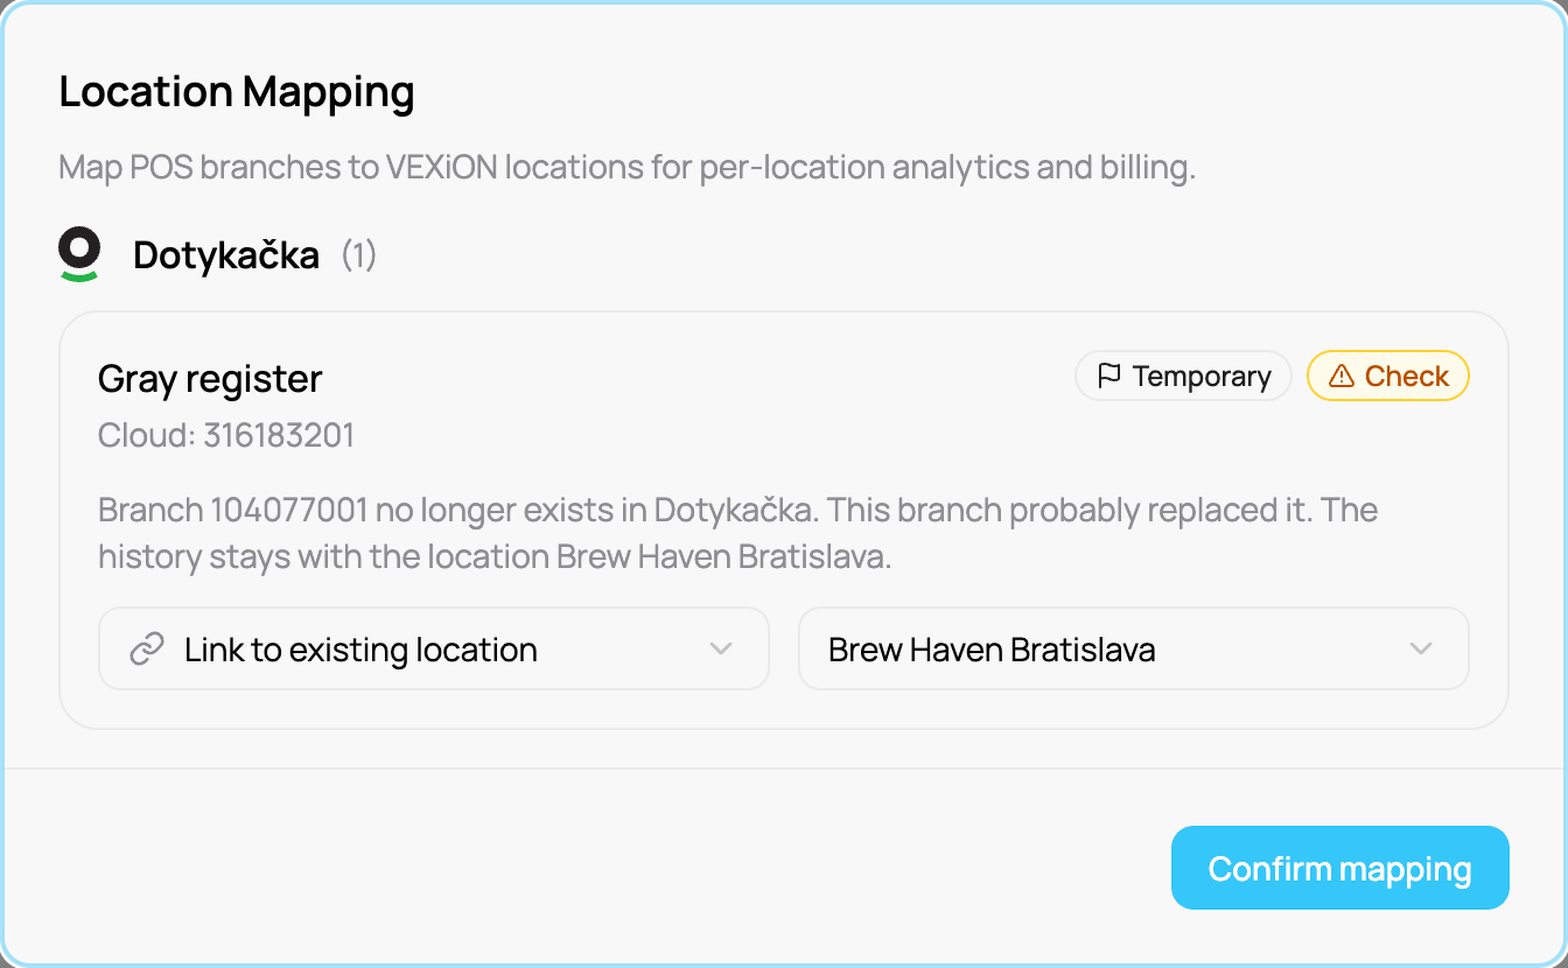
A replaced POS branch waiting for your check
Team & Billing
- Team: the staff assigned to this location, shown as chips with their role (for example “Anna · Scanner”, “Peter · Manager”). Assign people here or from the Team tab.
- Delegated Billing toggle: when on, the assigned manager pays for this location independently through their own subscription. See Delegated billing.
The many ways to add and delegate a location
VEXiON gives you several routes to the same result, use whichever fits how you are working: To add a location:- Locations tab → Create Location.
- Billing tab → Locations card shows the price per location and your next payment. See Per-location pricing.
- On the location itself: open Edit, assign the manager under Team, and turn on Delegated Billing.
- When inviting a manager: on the Team tab, invite them as a Manager, assign their location(s), and choose which of those to delegate.
Locations and your plan
VEXiON cards ONE includes one location. On PRO, you can run multiple locations, each priced on a graduated scale. On ONE, the first tile says VEXiON ONE allows 1 location and offers Upgrade to PRO. On PRO there is no fixed limit: when you add a location beyond the number you pay for, the Create Location window shows the price you pay today and the price per location. If your bank asks you to confirm the payment, you confirm it in the same window, and the location works at once. A payment you leave open appears on the Billing tab, see Per-location pricing. Accounts billed through Shopify or on a plan managed by VEXiON see a Contact us prompt to add more locations.For how per-location billing is priced, see Per-location pricing. For the full franchise / delegation mechanics, see Delegated billing.